Docs · Layers
Working with layers in LibreSprite
Layers let you keep parts of a sprite apart, so you can redraw the arm without touching the body, or hide the outline while you shade. In LibreSprite every layer runs through every frame of the animation. Here is everything you can do with them in 1.3.
On this page 14 sections
Short answer
Does LibreSprite have layers?
Yes. Add one with Layer → New Layer (Ctrl+Shift+N), work in the layer list on the left side of the timeline (Tab shows it), and drag layers up or down to reorder them. What LibreSprite does not have is layer groups (folders), tilemap layers and reference layers; there are workarounds for each below.
Layers, frames and cels
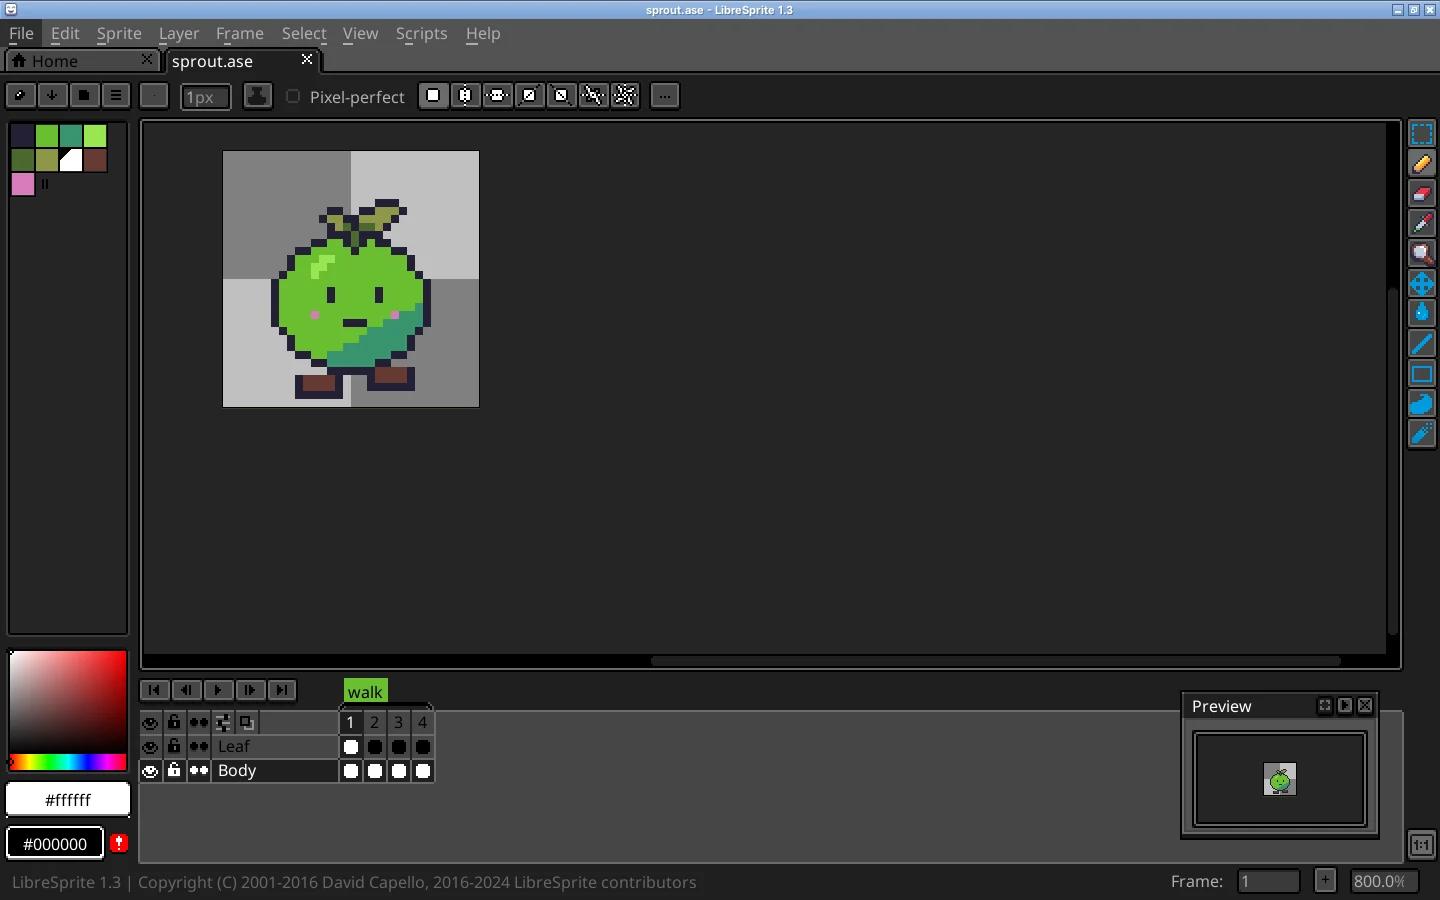
The timeline is a grid: layers are rows (the top row is drawn on top), frames are columns. Each square is a cel, the image of one layer in one frame. A filled dot means the cel has content; an empty one means it is empty. Our demo sprite has two layers, Leaf above Body, over four frames:
Add, duplicate and delete layers
| Action | Menu | Key |
|---|---|---|
| New layer (above the current one) | Layer → New Layer | Ctrl+Shift+N |
| Duplicate the current layer | Layer → Duplicate | Ctrl+J |
| Delete the current layer | Layer → Remove Layer | — |
| Show / hide the current layer | Layer → Visible | Shift+X |
| Layer properties (name, blend mode, opacity) | Layer → Properties | Shift+P |
| Go to the layer above / below | — | ↑ / ↓ |
Rename a layer
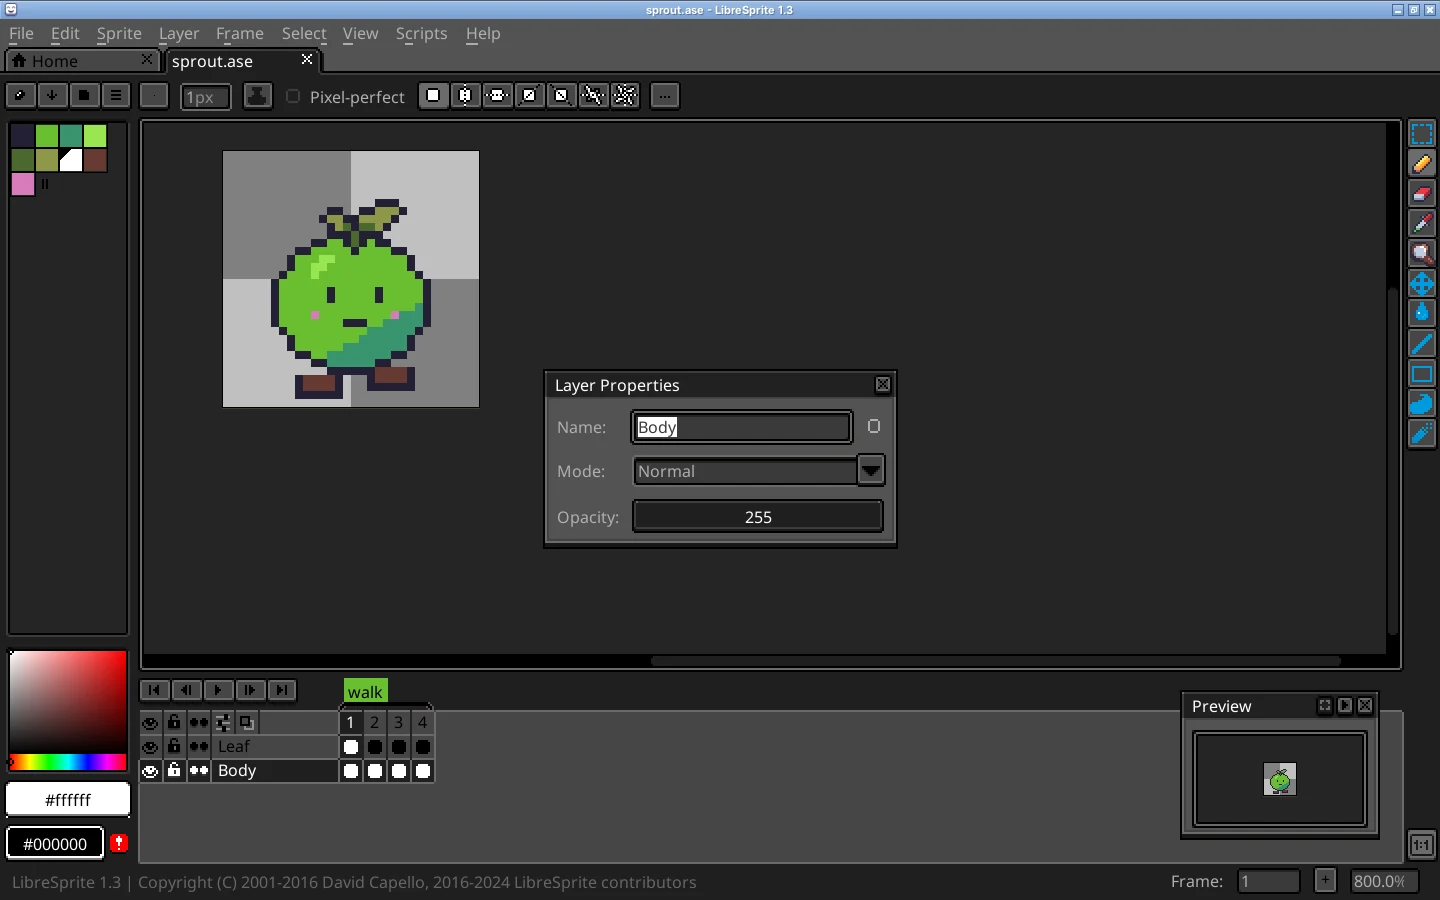
Double-click its name in the timeline, or open Layer → Properties (Shift+P) and type a new name.
Move layers up and down
Drag the layer by its name in the timeline to a new position. The order decides what covers what: the top layer is drawn last. To move a layer’s content on the canvas instead, use the Move tool (V, or hold Ctrl).
Show, hide and lock
Each layer row starts with an eye (visibility) and a padlock (editable). Click the eye to hide a layer while you work; hidden layers are left out of exports unless you choose otherwise. Click the padlock to protect a layer from accidental edits. A third icon toggles continuous mode, which makes copied cels link by default (see linked cels).
Opacity and blend modes
Layer Properties sets an opacity (0–255) and one of 1.3’s 16 blend modes: Normal, Multiply, Screen, Overlay, Darken, Lighten, Color Dodge, Color Burn, Hard Light, Soft Light, Difference, Exclusion, Hue, Saturation, Color and Luminosity. A Multiply layer is a quick way to add shadows; lower opacity is handy for a sketch or reference layer.
Background layer vs transparent layers
A sprite created with a White or Black background starts with a special Background layer: it is opaque, cannot be moved above others, and erasing paints the background colour instead of transparency. A sprite created with a Transparent background has none. Convert with Layer → Layer from Background (to make it a normal, transparent-capable layer) or Background from Layer. This is the usual cause of “my eraser paints white”. Make a transparent background.
Merge and flatten
Layer → Merge Down (Ctrl+E) combines the current layer with the one below it. Layer → Flatten (Ctrl+Shift+E) combines all layers into one. Both apply to every frame. Save a copy first if you might want the layers back.
Linked cels
A linked cel shows the same image in several frames: draw it once, every linked frame updates. Make them with Frame → Duplicate Linked Cel(s) (Alt+M) or by turning on a layer’s continuous mode before copying. Perfect for parts that do not move, such as a background or a body while only the eyes blink.
Can LibreSprite group layers?
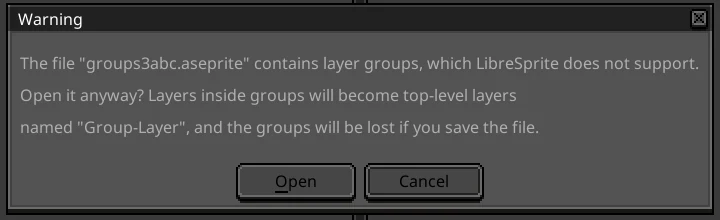
No. Layer groups (folders) came to Aseprite after LibreSprite forked. When you open an .aseprite file that uses groups, LibreSprite 1.3 warns you first. If you choose Open, every layer inside a group becomes a normal top-level layer named group-layer (for example player-head), hidden layers included. One catch we found: if a whole group was hidden in Aseprite, its layers show up again, because the group’s visibility (and its opacity and blend mode) is not carried over. Check the result before you save. The groups themselves are lost if you save over the file, so save a copy. We tested this with Aseprite’s own test files:
Workarounds while drawing: name layers with prefixes (arm-upper, arm-lower), keep separate files for big sprites, or merge finished parts.
Layer masks and clipping
There are no layer masks or clipping layers. To paint only inside existing pixels, use the Lock Alpha ink (inks); to protect an area, make a selection first: tools only draw inside an active selection.
Reference images
LibreSprite has no special reference layer. Put the reference picture on its own layer at the bottom, lower its opacity in Layer Properties, lock it, and hide it before exporting. Step by step.
Tilemap layers?
Not in LibreSprite. For tiles, use Tiled Mode and the grid instead: make a tileset in LibreSprite.
FAQ
How do I add a new layer in LibreSprite?
Layer → New Layer, or Ctrl+Shift+N. It appears above the current layer in every frame.
How do I change the layer order?
Drag the layer’s name up or down in the timeline’s layer list. Press Tab if the timeline is hidden.
Why can’t I see my layers?
The layer list is part of the timeline, which is hidden by default. Press Tab (View → Timeline).
Can I select all layers?
Click the first layer name and Shift-click the last to select a range; then you can move or delete them together. To move the content of all layers at once, select all frames and layers in the timeline and use the Move tool.
Keep going
Found something wrong or out of date? Tell us: hello@libresprite.dev. We fix mistakes within a day.