Guide · Transparency
Transparent backgrounds in LibreSprite
Game sprites and stickers need a transparent background. Most problems come from one thing: the special Background layer, which can’t be transparent. Here is how to start right, how to fix a file that started wrong, and how to export it.
On this page 6 sections
Short answer
How do I make the background transparent in LibreSprite?
For new art: File → New and choose Background: Transparent. For an existing sprite whose eraser paints white: Layer → Layer from Background, then erase or delete the background (select it with the Magic Wand, W, and press Del). Export as PNG or GIF; JPG and BMP cannot store transparency.
Start with a transparent sprite
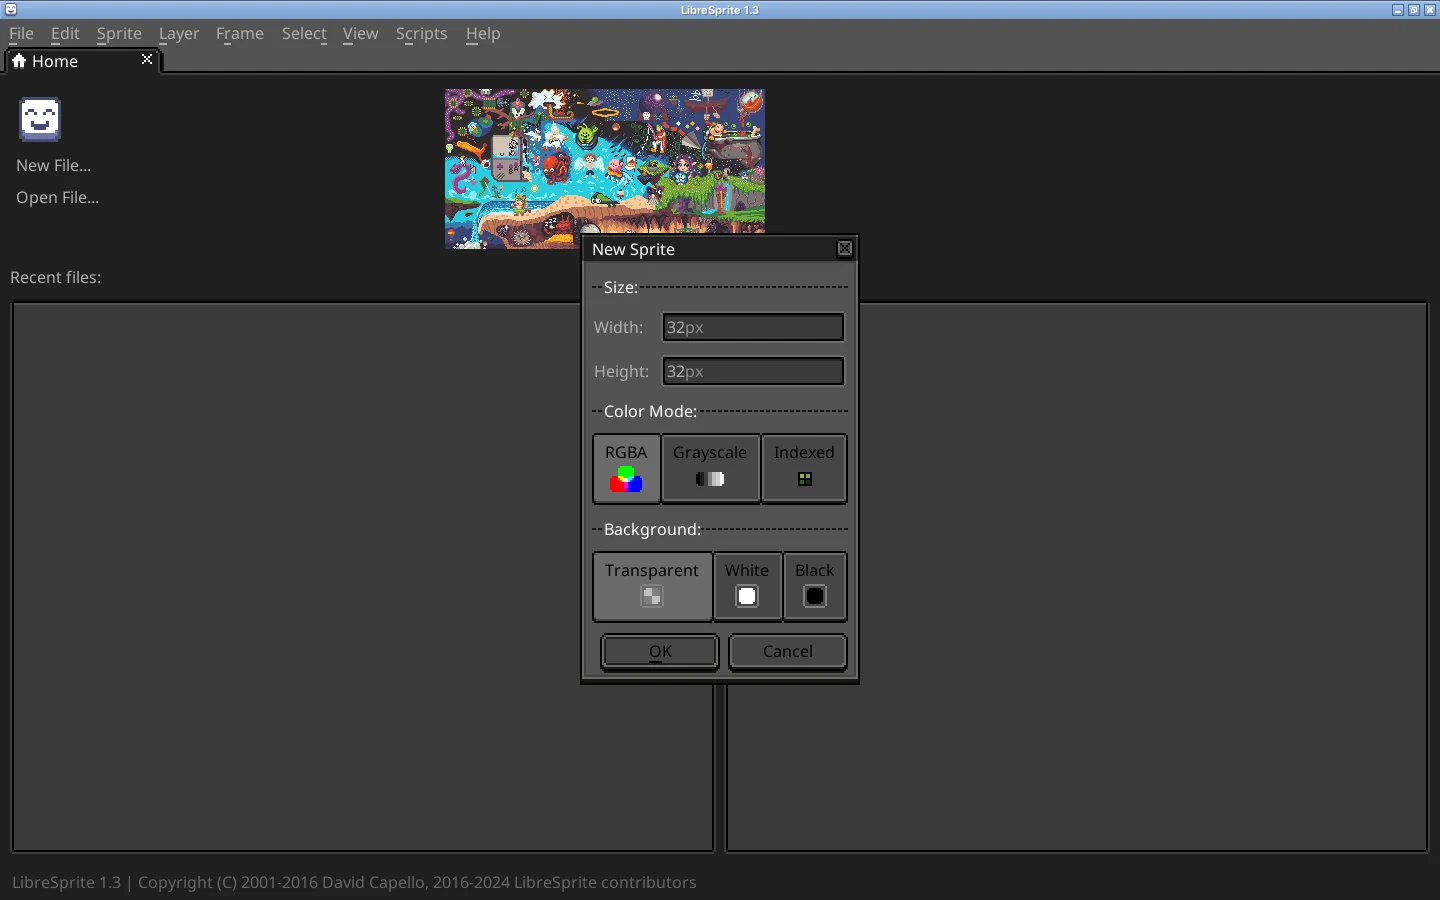
The New Sprite dialog (Ctrl+N) has three background choices: Transparent (the default), White and Black. White and Black create an opaque Background layer; Transparent creates a normal layer you can erase to nothing. The grey checkerboard you see is not part of the image: it just shows where the image is empty.
Why the eraser paints white (the Background layer)
If the bottom layer is named Background (in italics in the timeline), it is opaque by design: the Eraser paints the background colour and Del fills with it. Images that have no transparency, such as JPG and BMP files, also open with a Background layer (we saw this in our format tests).
Convert it
Layer → Layer from Background. The layer becomes a normal one, and the eraser now makes pixels transparent.
Remove the background colour
Pick the Magic Wand (W), click the background, and press Del. For a background that also shows between other parts of the art (inside a letter “O”, between legs), use Select → Color Range instead: it selects that colour everywhere, not just the connected area.
Check every frame
Selections and deletions work on the current frame. For an animation, repeat per frame, or use Edit → Replace Color with the target set to all frames (see below).
Remove a background colour from all frames at once
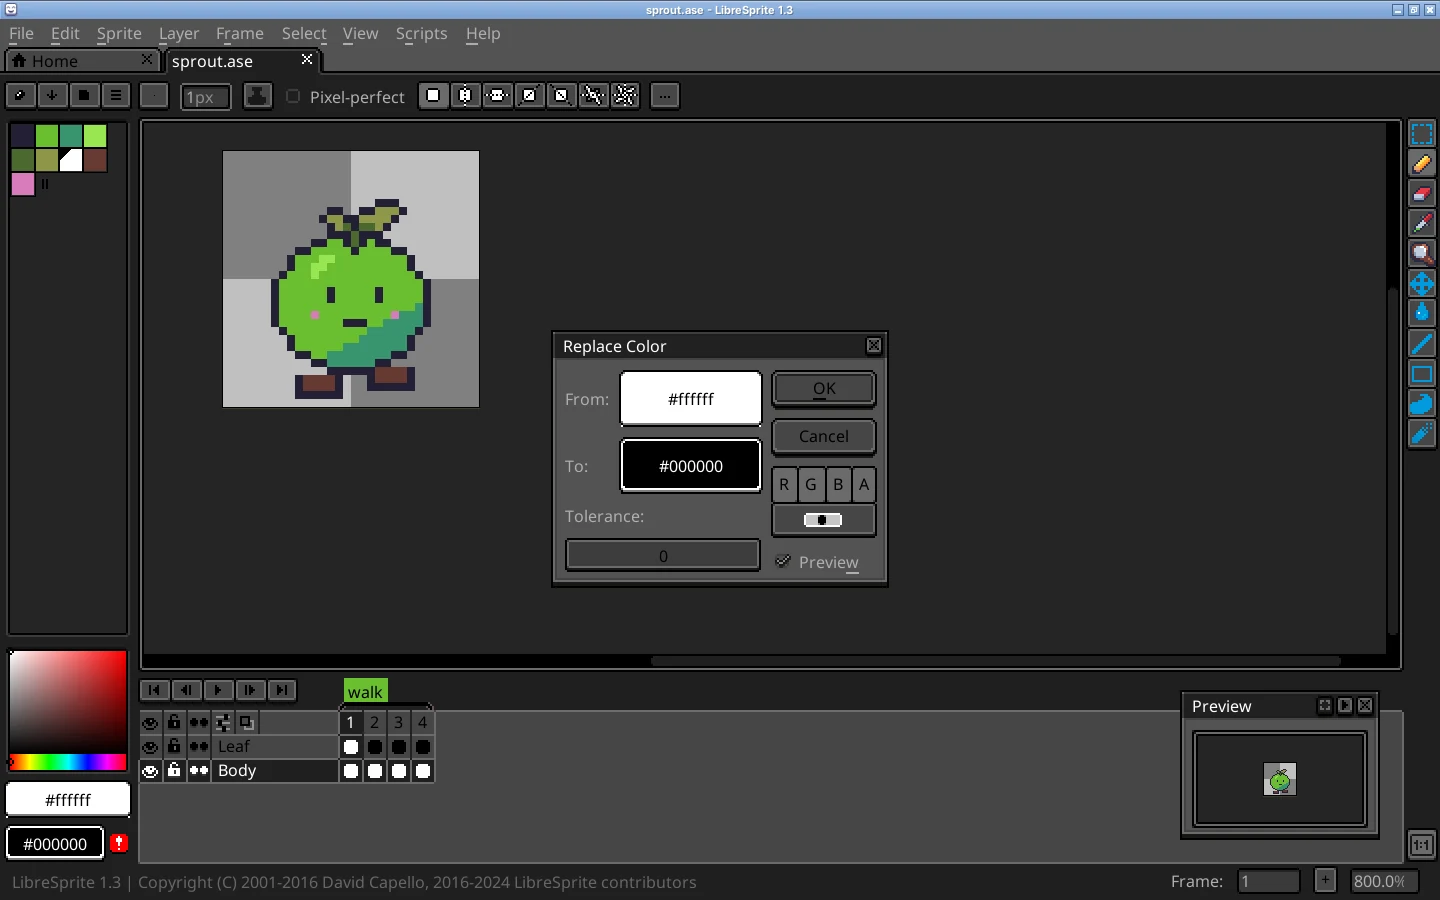
Edit → Replace Color (Shift+R): set From to the background colour and To to a fully transparent colour (alpha 0 in the colour picker), set Tolerance to 0 for an exact match, and use the target button to apply it to all frames. On an indexed sprite you can instead set that palette entry as the transparent colour in Sprite → Properties.
Prefer a script? The bundled white_to_alpha script (Scripts menu) turns white into transparency on the current cel, fading lighter pixels too, which suits scanned line art more than pixel art.
Export with transparency
| Format | Transparency |
|---|---|
| PNG, WebP, QOI, TGA | full including semi-transparent pixels |
| GIF | on/off one fully transparent colour; semi-transparent pixels become solid or empty |
| JPG, BMP | none transparent areas turn into a solid colour |
File → Export (Ctrl+Alt+Shift+S) for single images, File → Export Sprite Sheet for sheets: export guide. Hidden layers are left out of exports, which is handy for a hidden reference or backdrop layer.
Seeing transparency clearly
Change the checkerboard size and colours in Preferences → Grid & Background if it is hard to see edges against it; a solid bright colour (magenta, lime) shows stray semi-transparent pixels instantly. It never affects the exported file.
FAQ
Why does my PNG have a white background?
The sprite has an opaque Background layer, or it was created with a White background. Convert it with Layer → Layer from Background, remove the white, and export again.
How do I remove the background from an image I imported?
Open it, Layer → Layer from Background if needed, then Magic Wand + Delete or Select → Color Range + Delete. Clean photo cut-outs are hard in any pixel editor; it works best on flat-colour art.
My GIF has ugly edges.
Your art has semi-transparent edge pixels, and GIF can only do fully transparent or fully opaque. Keep edges opaque in pixel art, or export PNG instead.
Keep going
Found something wrong or out of date? Tell us: hello@libresprite.dev. We fix mistakes within a day.