Docs · Interface
The LibreSprite interface, explained
LibreSprite fits a whole animation studio into one window. This is a map of it: what each part is called, what it does and how to bring it back when it disappears. The screenshot is LibreSprite 1.3 with our demo sprite open; the numbers are ours.
On this page 6 sections
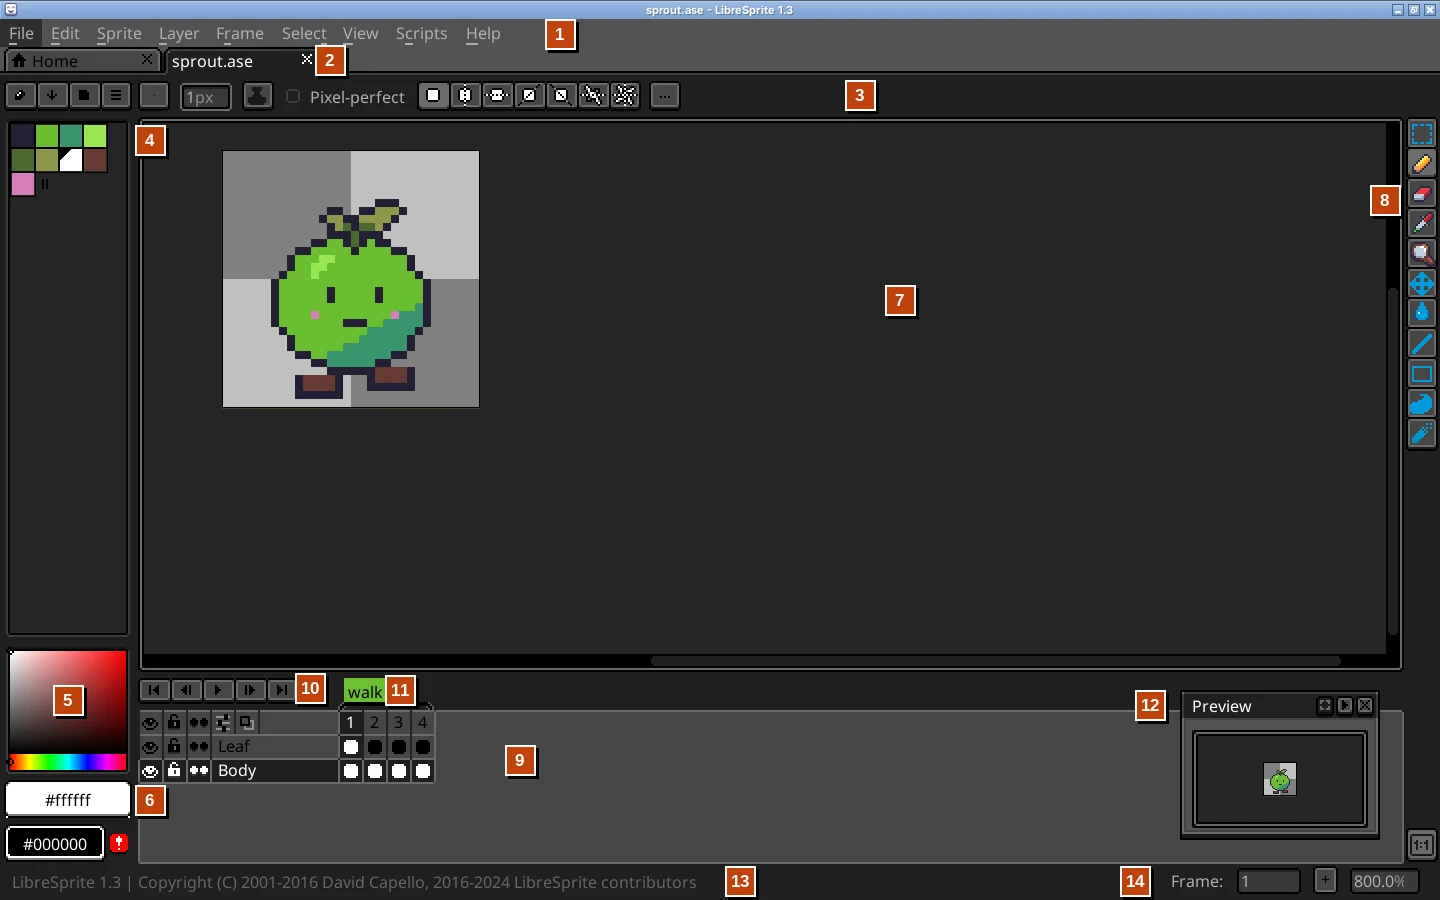
- Menu bar. File, Edit, Sprite, Layer, Frame, Select, View, Scripts and Help. Every command is listed on the menu reference.
- Tabs. One per open sprite, plus the Home tab. A dot on a tab means unsaved changes. Switch with Ctrl+Tab.
- Tool options bar (context bar). Changes with the current tool: brush type and size, ink, opacity, pixel-perfect, symmetry and more. Tools.
- Palette. The sprite’s colours, with four buttons above: Edit Color, Sort & Gradients, Presets and Options. Palettes and colour.
- Colour selector. Tint/Shade/Tone square plus hue strip by default; Spectrum and colour wheels are in the palette Options.
- Foreground and background colours. Left click paints with the top one, right click with the bottom one. A red ! means the colour is not in the palette.
- Canvas (the editor). Scroll with the mouse wheel to zoom, hold Space to pan, 1–6 for fixed zoom levels, Shift+C to centre the sprite.
- Toolbar. One button per tool group. Click a button to pick its tool; a small pop-out shows the other tools in the same group. The last button at the bottom shows or hides the Preview window.
- Timeline. Layers as rows, frames as columns, cels in the grid. Hidden by default: press Tab. Animation and layers.
- Playback buttons. First, previous, play, next and last frame.
- Tags. Named frame ranges such as “walk” above the frame numbers.
- Preview window. A second view of the sprite at its own zoom, handy for seeing pixels at real size while you zoom in on the canvas. F7 toggles it, F8 shows a full-screen preview.
- Status bar (left). Messages, and while the pointer is over the canvas: the cursor position, the sprite size, the current frame and its duration in milliseconds.
- Frame and zoom (right). Type a frame number to jump to it, + adds a frame, and the zoom box shows or sets the zoom level.
The Home tab
The first thing you see on a fresh start: New File…, Open File…, and lists of recent files and folders. Close it like any other tab. It comes back when no sprite is open.

Get a missing panel back
| Missing | Bring it back |
|---|---|
| Timeline (layers and frames) | Tab or View → Timeline |
| Preview window | F7 or the bottom toolbar button |
| Palette, colour selector and toolbar (only the canvas is left) | You pressed F11, Advanced mode. It cycles between normal, “tool options and timeline only” and “canvas only”; press F11 until the panels return. |
| Palette Editor at the bottom | F4 toggles it |
| Grid, selection edges and other overlays | Ctrl+H toggles View → Extras |
| The whole window is huge or tiny | UI scale: interface is huge, tiny or blurry |
Drawing aids in the View menu
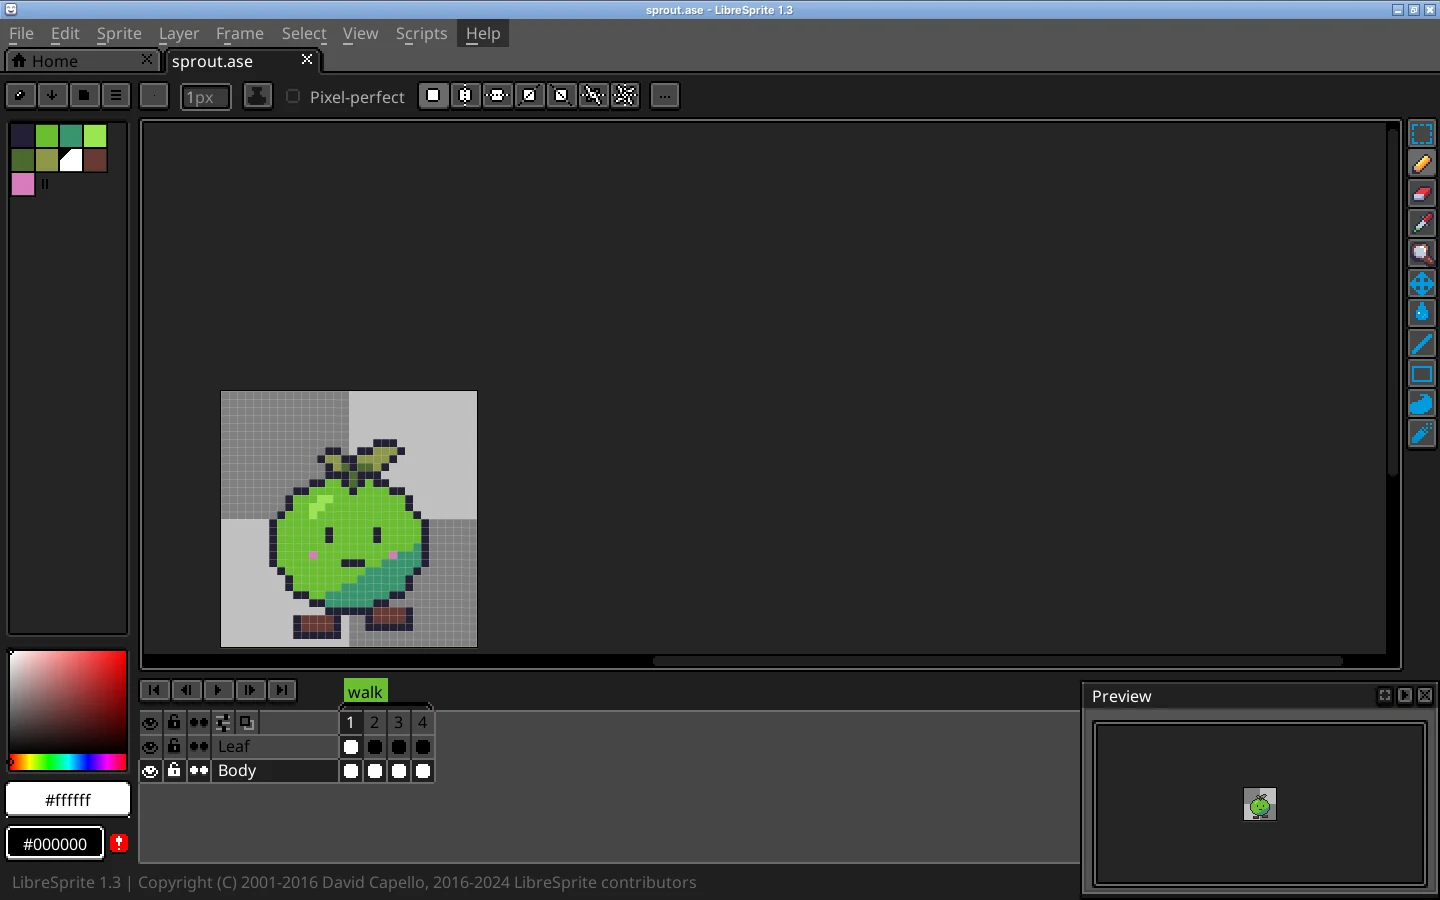
- Grid (Shift+G) and Pixel Grid (Alt+Shift+G). Set the grid size in View → Grid → Grid Settings, and turn on Snap to Grid with Shift+S.
- Onion skin (F3) shows neighbouring frames faintly while you animate.
- Tiled Mode (Shift+T for both axes) repeats the sprite around itself, so you can see whether a texture tiles seamlessly. Draw across the edge and the stroke wraps to the other side.

Alternate layouts and the touchbar
Three switches in the View menu rearrange the window; LibreSprite remembers them:
- Alternate Timeline puts the timeline beside the canvas instead of under it, which suits sprites with many layers on a wide screen.
- Alternate Toolbar moves the toolbar from the right edge to the left.
- Touchbar (off by default) adds a row of big buttons for touchscreens and tablets: UNDO, REDO, LYR+ (new layer), LYR< / LYR> (next and previous layer), FRM+ (new frame), PLAY and TIME (timeline). Alternate Touchbar moves it to the other side.
Make the interface your own
- Themes: Preferences → Theme. LibreSprite ships two themes, “default” and “classic”, and community themes are easy to add. Themes.
- Size: Preferences → General has Screen Scaling (the whole picture) and UI Elements Scaling (widgets and text). Preferences.
- Keys: Edit → Keyboard Shortcuts. All shortcuts.
- Swatch size: palette Options → Small, Medium or Large Size.
FAQ
Where is the timeline in LibreSprite?
It is hidden until you press Tab (View → Timeline). It then appears under the canvas.
How do I see all the tools?
The toolbar shows one button per group. Click a button and a pop-out lists every tool in that group, or press the tool’s key again to cycle (for example U: Rectangle, then Filled Rectangle).
Can I move or dock the panels?
Not freely, but the View menu has three layout switches: Alternate Timeline (timeline on the side instead of underneath), Alternate Toolbar (toolbar on the left) and Touchbar. You can also hide panels (Tab, F7, F11), drag the edge between the canvas and the timeline or colour bar, and move the Preview and Palette Editor windows.
How do I go full screen?
View → Toggle Fullscreen (Shift+F) for the window, or F8 for a full-screen preview of the sprite only.
Keep going
Found something wrong or out of date? Tell us: hello@libresprite.dev. We fix mistakes within a day.