Docs · Palettes & colour
Palettes and colour in LibreSprite
Pixel art lives and dies by its palette. LibreSprite 1.3 ships 38 classic palettes, reads GIMP, Paint Shop Pro and PNG palettes from sites like Lospec, and has tools to sort, blend, replace and shade with them. We loaded, saved and converted real files to check every claim on this page.
On this page 14 sections
- The colour bar: palette, foreground and background
- Load one of the 38 built-in palettes
- Import a palette from Lospec, GIMP or elsewhere
- Save and share a palette
- Edit colours with the Palette Editor
- Add, remove, move and sort colours
- Make a palette from your sprite
- Replace a colour across the sprite
- Hue, saturation and brightness: what 1.3 has
- Change the background colour
- RGB, grayscale and indexed colour modes
- Dithering
- The Shading ink
- FAQ
Short answer
How do I change the palette in LibreSprite?
Click the Presets button (third icon above the colour bar), pick one of the 38 palettes and press Load. To use a palette you downloaded, open the Options button (fourth icon) → Load Palette and choose a .gpl, .pal or .png file. The palette belongs to the sprite, so remember to save the sprite afterwards. Loading a palette never recolours an RGB sprite; it only changes the colours you can pick.
The colour bar: palette, foreground and background
Everything colour-related sits in the column on the left of the window:
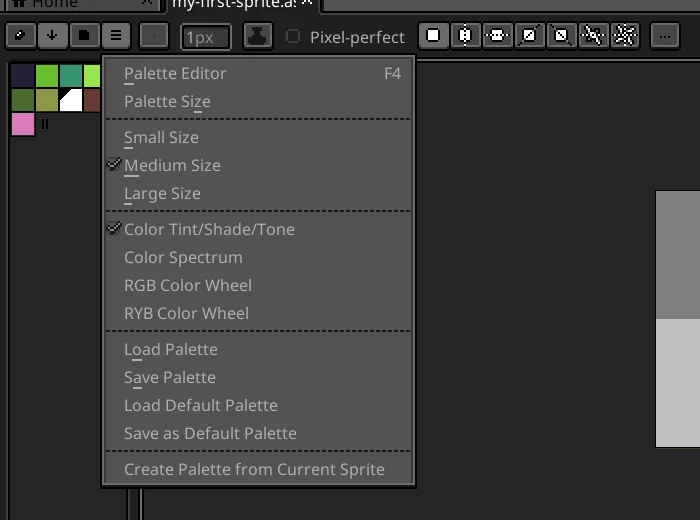
- Four buttons across the top: Edit Color (opens the Palette Editor, F4), Sort & Gradients, Presets and Options.
- The palette grid. Left-click a swatch to make it the foreground colour; right-click to make it the background colour.
- The colour selector below it: Tint/Shade/Tone by default. Options switches it to Color Spectrum, RGB Color Wheel or RYB Color Wheel.
- Foreground (top) and background (bottom) colour boxes with their hex values. A red ! next to one means that colour is not in the palette; click it to add it.
| Do this | Key or mouse |
|---|---|
| Swap foreground and background | X |
| Previous / next palette entry as foreground | 9 / 0, or [ / ] |
| Previous / next palette entry as background | Ctrl+9 / Ctrl+0 |
| Pick a colour from the canvas (Eyedropper) | I, or hold Alt with any drawing tool and click |
| Show / hide the Palette Editor | F4 |
Load one of the 38 built-in palettes
The Presets button opens Available Palettes: every palette in LibreSprite’s data/palettes folder, alphabetically, with a strip of its colours. Select one and press Load. Palettes you add yourself are listed after the built-in ones (see importing).
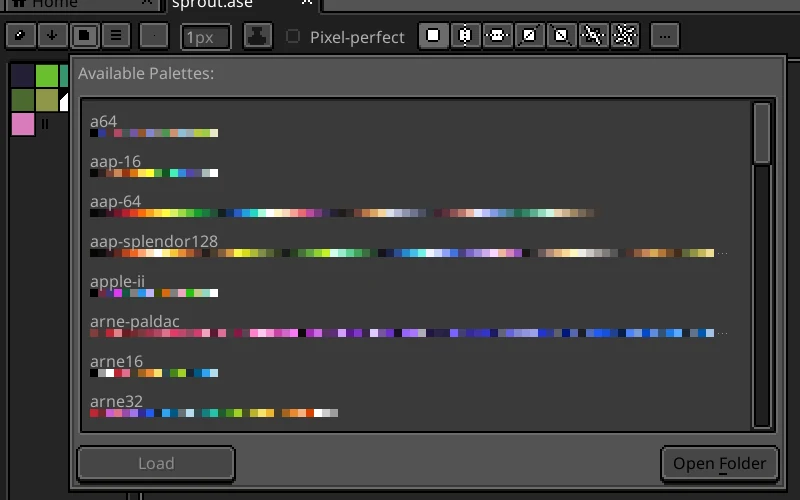
A few of the built-in palettes, drawn from the files in LibreSprite 1.3:
pico-8.gpl16 coloursdb16.gpl16 coloursdb32.gpl32 coloursaap-64.gpl64 coloursarne16.gpl16 coloursnes.gpl56 coloursgameboy.gpl4 colourscommodore64.gpl16 colourscga.gpl16 colourszx-spectrum.gpl16 colourssolarized.gpl16 coloursmonokai.gpl12 colours
All 38, with download links and hex values, are in our palette browser. Load Default Palette (in Options) brings back the 32-colour palette new sprites start with.
Import a palette from Lospec, GIMP or elsewhere
We made one 16-colour palette (Sweetie 16) in every format Lospec offers and loaded each into LibreSprite 1.3:
| File | Result in our test |
|---|---|
GIMP palette .gpl | works all 16 colours, in file order |
Paint Shop Pro / JASC .pal | works all 16 colours, in file order |
| PNG strip, 1 pixel per colour (Lospec “PNG image 1×”) | works 16 colours, left to right |
| PNG strip, 8× scale | works 16 colours; the size does not matter |
| Indexed (paletted) PNG | works uses the PNG’s own colour table, so the order can differ from what you see |
| PNG with an alpha channel | extra entry 17 entries: a transparent black entry 0, then the 16 colours |
Lospec .hex | not supported not loaded |
Any image LibreSprite can open also works as a palette source (it uses the image’s colours), and so does an Animator Pro .col file.
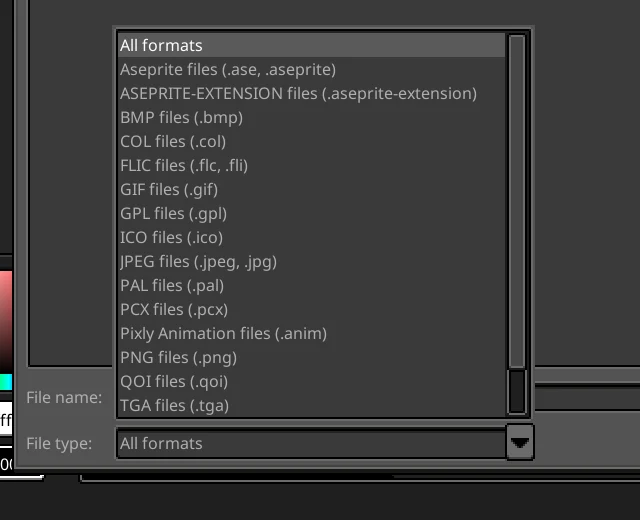
Load it once, for this sprite
Options → Load Palette → choose the file. The colour bar changes at once; save the sprite to keep the palette with it.
Or install it, so it is always in Presets
Click Presets → Open Folder. This opens your user palettes folder (
~/.config/libresprite/palettes/on Linux,%AppData%\LibreSprite\palettes\on Windows,~/Library/Application Support/LibreSprite/palettes/on macOS). Copy the.gpl,.palor.pngfile into it.Restart LibreSprite
The Presets list is read when the app starts. Our copied file only appeared after a restart.

Downloading from Lospec
Choose GIMP GPL, PAL (JASC) or a PNG download. Skip HEX: LibreSprite cannot read it. If you only have hex codes, paste them into a .gpl file: the first line GIMP Palette, then one R G B line (numbers 0–255) per colour.
Save and share a palette
Options → Save Palette, then pick the format by typing the extension. What LibreSprite wrote when we saved our demo sprite’s 9 colours:
| Extension | What you get |
|---|---|
.gpl | GIMP palette. Every colour is named “Untitled” and there is no palette name line; add Name: … by hand if you share it. |
.pal | JASC palette: JASC-PAL, 0100, the colour count, then one R G B line per colour. |
.png | A one-pixel-high indexed PNG strip (16 pixels wide for our 9 colours). |
.col | Animator Pro palette, always 776 bytes (256 slots). |
Save as Default Palette makes the current palette the one every new sprite starts with. It is stored as default.ase in the user palettes folder, so deleting that file brings back the original default.
Edit colours with the Palette Editor
Select a swatch and press F4 (or the Edit Color button). The editor docks at the bottom of the window:
- RGB or HSB sliders, plus A (alpha), each with a number box.
- A hex field: type
ef7d57to set the colour exactly. - Abs / Rel. In Abs mode the sliders set values. In Rel mode they add to each selected colour’s values, which is how you shift several colours at once.

Editing a palette entry changes every pixel that uses it only in an indexed sprite. In an RGB sprite the pixels keep their old colour, and the edited swatch simply becomes a new colour to paint with.
Add, remove, move and sort colours
- Select several entries: click the first, Shift-click the last.
- Add a colour: set it as foreground (from the colour selector, the hex box or the eyedropper) and click the red ! next to it. It is added at the end of the palette.
- Move colours: drag the outline of the selected entries to a new position. Hold Ctrl or Alt while dropping to copy instead of move.
- Remove colours / change the count: drag the small handle after the last swatch, or use Options → Palette Size. Shrinking removes entries from the end, so move the colours you want to drop to the end first.
- Swatch size: Options → Small, Medium or Large Size.
The Sort & Gradients button works on the selected entries:
| Item | What it does |
|---|---|
| Reverse Colors | Flips the order of the selected entries. |
| Gradient | Keeps the first and last selected colours and fills the entries between them with even steps: a quick colour ramp. |
| Sort by Hue, Saturation, Brightness, Luminance | Sorts the selection by that value. |
| Sort by Red, Green, Blue, Alpha | Sorts by one channel. |
| Ascending / Descending | Sets the sort direction. |
In an indexed sprite, moving or sorting entries changes which colour each pixel points to. A Remap button appears under the palette after such a change; press it to keep the picture looking the same with the new order.
Make a palette from your sprite
Options → Create Palette from Current Sprite collects the colours the sprite actually uses. The dialog offers:
- Create new palette with N colors or less (256 by default). LibreSprite reduces the colours if the sprite has more.
- Replace current palette, or Replace current range (only the selected entries).
- Create entries with alpha component, for semi-transparent colours.
Handy after painting freely in RGB: build the palette, then save it or convert the sprite to indexed.
Replace a colour across the sprite
Edit → Replace Color… (Shift+R) swaps one colour for another. Set From and To (they start as your foreground and background colours) and a Tolerance (0–255; 0 replaces only the exact colour, higher values also catch similar shades).
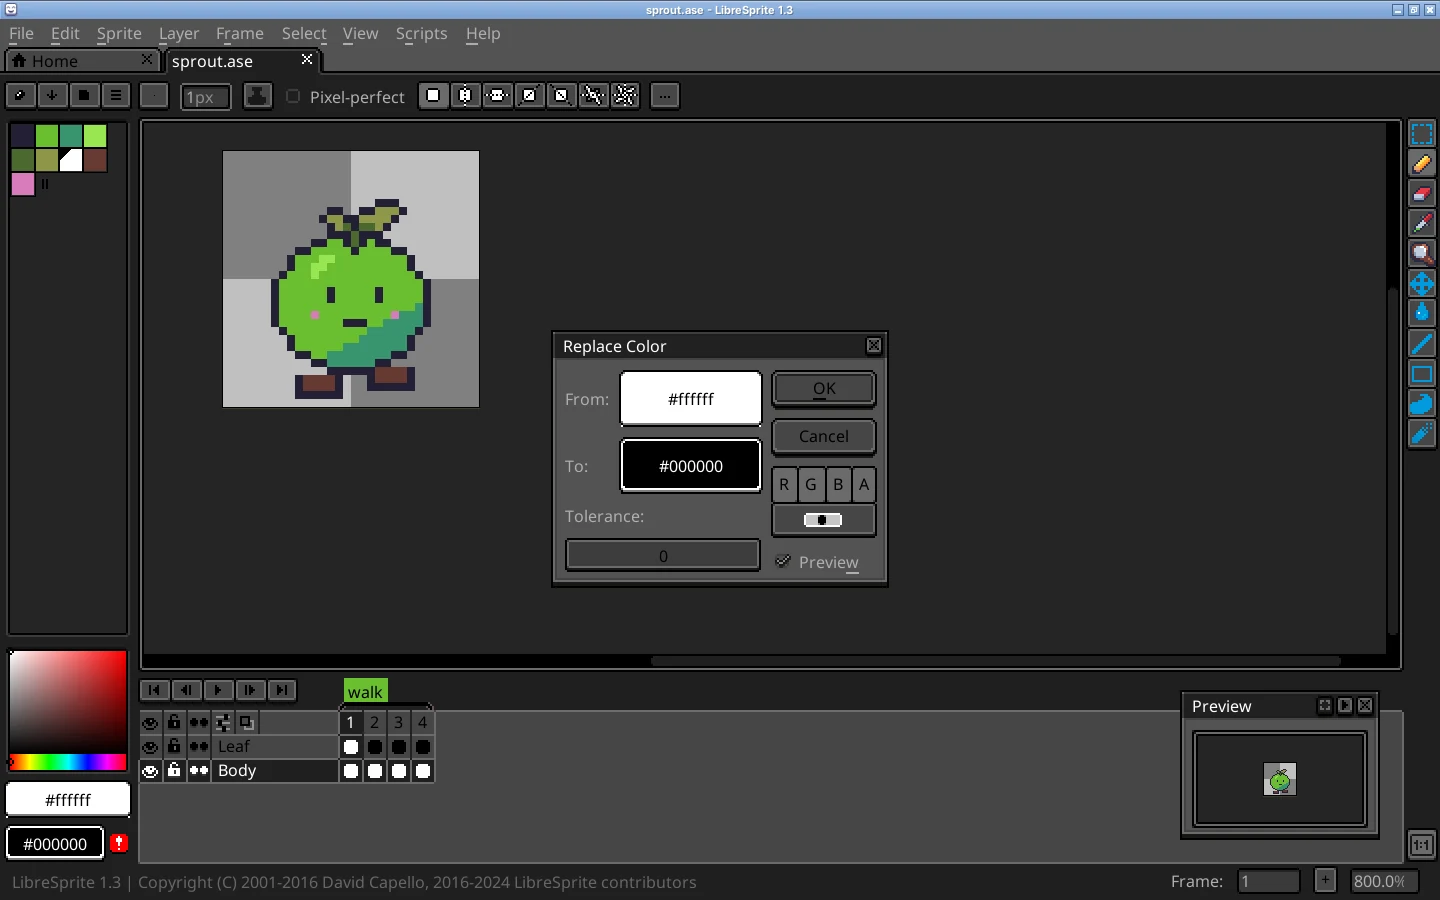
By default it changes only the active cel: the current layer in the current frame. The button next to the channel buttons cycles through all frames in the active layer, all layers in the active frame and all cels in the sprite. Its tooltip tells you which is set. With a selection active, only the selected area changes.
Recolour a whole indexed sprite in one go
In an indexed sprite you do not need Replace Color: edit the palette entry in the Palette Editor and every pixel using it updates in every frame.
Hue, saturation and brightness: what 1.3 has
LibreSprite 1.3 has no Hue/Saturation dialog (Aseprite added one after the fork). These do the same jobs:
| Goal | Use |
|---|---|
| Hue-shift a set of palette colours | Select the entries, open the Palette Editor, choose HSB and Rel, drag H. In an indexed sprite the pixels follow. |
| Lighten, darken or change contrast of the image | Edit → FX → Color Curve (Ctrl+M or F10) |
| Invert colours | Edit → Invert |
| Tint a layer non-destructively | A layer above with blend mode Hue, Saturation, Color or Luminosity (blend modes) |
| Swap one exact colour | Replace Color |
Change the background colour
“Background colour” can mean three different things in LibreSprite:
- The sprite’s background when you create it. The New Sprite dialog (Ctrl+N) offers Transparent, White or Black. White and Black create an opaque Background layer. For a transparent image, pick Transparent or use Layer → Layer from Background. More in transparent backgrounds.
- The background colour box under the palette. It is what the eraser paints on a Background layer. Right-click a swatch to set it, or press X to swap it with the foreground.
- The grey checkerboard that shows transparency. Edit → Preferences (Ctrl+K) → Grid & Background → Checked Background sets its size and its two colours. It never appears in exports.
RGB, grayscale and indexed colour modes
Every sprite has one colour mode, chosen in the New Sprite dialog and changed later with Sprite → Color Mode:
| Mode | Each pixel stores | Use it for |
|---|---|---|
| RGB (“RGBA” in New Sprite) | Red, green, blue and alpha (32 bits) | Free painting, any colour, semi-transparency. The default. |
| Grayscale | A grey value and alpha (16 bits) | Value studies, masks. |
| Indexed | A palette entry number (8 bits, up to 256 colours) | Strict palettes, retro hardware limits, recolouring by editing the palette, small GIFs. |
The menu offers Indexed (No Dithering) and Indexed (Ordered Dither). Both map every pixel to the nearest colour in the current palette, so load the palette you want before converting. We converted a smooth-shaded ball (48 × 48, drawn in RGB) with LibreSprite 1.3 itself:
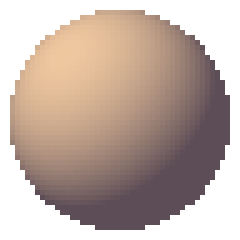
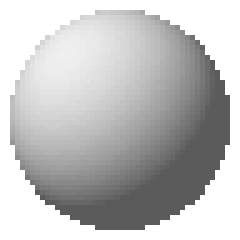
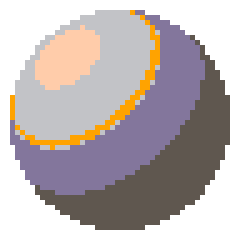
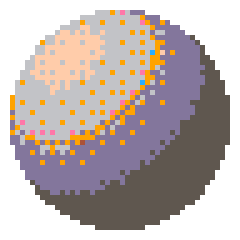

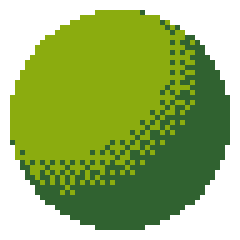
Notice that the conversion uses only the palette colours closest to the image: the ball used 5 of PICO-8’s 16 colours without dithering and 8 with it, and only 2 of the Game Boy’s 4 greens. For a better result, pick or build a palette that matches the image’s range first (Create Palette from Current Sprite).
Transparency in indexed mode: one palette entry acts as transparent (entry 0 by default). Change it in Sprite → Properties (Ctrl+P) → Transparent Color. That setting only exists for indexed sprites.
Dithering
LibreSprite 1.3 dithers in one place: converting to indexed with Indexed (Ordered Dither), which uses a regular dot pattern (see the images above). There is no dithering brush or dither ink. To dither by hand, draw a checkerboard with the Pencil and pixel-perfect mode on, or make a small checkerboard pattern into a custom brush (Edit → New Brush). Our gradients and dithering guide walks through both.
The Shading ink
Shading is an ink, not a separate tool: choose it from the ink menu in the tool options bar while using the Pencil (or another painting tool). Each stroke moves a pixel one step along a colour ramp instead of painting a fixed colour.
Pick the ramp
In the palette, click the darkest colour of a ramp and Shift-click the lightest, so the colours are next to each other from dark to light. The tool options bar shows the ramp as the current shade.
Set Shading ink
Pencil (B), then choose Shading in the ink menu.
Paint
The left button moves each pixel one colour towards the first colour of the ramp (darker, with a dark-to-light ramp). The right button moves it towards the last colour (lighter). Go over an area again to step it further.
Rules we confirmed in the source: only pixels that exactly match a palette colour change, so anti-aliased or off-palette pixels are left alone. With fewer than two colours selected, the whole palette is the ramp, in palette order. The shade menu in the tool options bar can Reverse Shade (swap what each mouse button does) and Save Shade for later.
FAQ
How do I add a Lospec palette to LibreSprite?
Download it from Lospec as GIMP GPL, PAL or PNG (not HEX). Then use Options → Load Palette for one sprite, or copy the file into the folder that Presets → Open Folder opens and restart LibreSprite to keep it in the Presets list.
Why didn’t my sprite change colour when I loaded a palette?
Your sprite is in RGB mode, where pixels store their own colours. Loading a palette only changes the swatches. To force the image onto the palette, use Sprite → Color Mode → Indexed after loading it.
How do I delete one colour from the palette?
There is no single delete command. Drag the colour to the end of the palette, then drag the resize handle (or set Options → Palette Size) one entry smaller.
Can LibreSprite hue-shift colours?
Yes, through the Palette Editor: select the palette entries, switch to HSB and Rel, and drag the H slider. In an indexed sprite, the pixels update with the palette. There is no Hue/Saturation dialog in 1.3.
What palette file formats does LibreSprite support?
Loading: .gpl, .pal (JASC), .col and any image format it opens (PNG, GIF, ASE and more). Saving: the same list. Not .hex or Adobe .act/.ase swatch files.
Where are LibreSprite’s palettes stored?
Built-in palettes are in the app’s data/palettes folder. Your own go in the palettes folder inside your settings folder. Presets → Open Folder opens it, and our settings locator lists the path for each system.
How do I make a colour transparent?
In RGB, paint with the eraser or a colour with alpha 0 (A slider in the Palette Editor). In indexed mode, pixels using the transparent entry (entry 0 by default; Sprite → Properties) are transparent.
Keep going
Found something wrong or out of date? Tell us: hello@libresprite.dev. We fix mistakes within a day.