Guide · Gradients & dithering
Gradients and dithering in LibreSprite
Smooth gradients are rare in pixel art anyway: artists use a few bands of colour and dithering between them. LibreSprite 1.3 has no gradient tool, but it has everything needed for the pixel-art way.
On this page 6 sections
Short answer
Does LibreSprite have a gradient tool?
No. Instead: build a colour ramp in the palette (select two colours → Sort & Gradients → Gradient fills the colours between them), paint bands with those colours, and dither the borders by hand or with a checkerboard custom brush. For automatic dithering of a smooth image, convert it with Sprite → Color Mode → Indexed (Ordered Dither).
1. Make a colour ramp
Pick the ends
Put your darkest and lightest colours in two palette slots with empty slots between them.
Select the range
Click the first slot, Shift-click the last.
Gradient
Click the Sort & Gradients button above the palette → Gradient. The slots in between fill with even steps.
Even RGB steps can look dull; good pixel-art ramps also shift hue (warmer in the light, cooler in the shadow). Adjust individual steps in the Palette Editor (F4), or start from a palette with ready-made ramps such as DB32 or AAP-64.
2. Paint bands
Fill areas with the ramp colours from dark to light: the Rectangle tool (U, press again for Filled Rectangle) for flat shapes, the Paint Bucket for enclosed areas. Hard bands are a valid look on their own.
3. Dither between bands
Dithering mixes two colours in a pattern so the eye blends them. Three ways in LibreSprite:
- By hand: Pencil with a 1 px brush, alternating pixels in a checkerboard along the border between two bands. Classic and fully controllable.
- Pattern brush: draw a small checkerboard (for example 2 × 2 or 4 × 4) in the two colours, select it, Edit → New Brush (Ctrl+B). In the tool options, set the brush pattern to Pattern aligned to destination so the checkerboard stays aligned to the canvas as you paint.
- Automatic, for a whole image: Sprite → Color Mode → Indexed (Ordered Dither) converts a smooth RGB picture to the current palette with a regular dot pattern. Load the palette first.
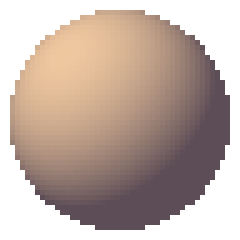
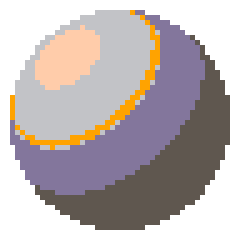
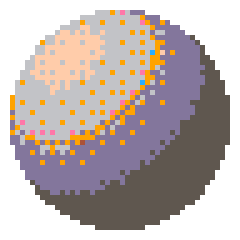
Converted by LibreSprite 1.3 itself (details on palettes and colour).
4. Shade quickly with the Shading ink
Select a ramp in the palette (dark to light, next to each other), take the Pencil, choose the Shading ink, and paint: the left button steps pixels one colour darker along the ramp, the right button one lighter. Pixels that are not in the ramp are left alone. How the Shading ink works.
Tips
- Use dithering sparingly on small sprites: at 16 × 16 it often reads as noise.
- Large, simple patterns (checkerboard, every-other-row) look cleaner than random ones.
- For skies and big backgrounds, 3–5 bands with a dithered strip between each work well.
FAQ
How do I make a gradient in LibreSprite?
A palette ramp (Sort & Gradients → Gradient) painted as bands, with dithering between them. There is no click-and-drag gradient tool in 1.3.
Is there a dithering brush?
Not built in, but a custom brush made from a small checkerboard selection works the same way.
Can I dither a photo automatically?
Yes: load a palette, then Sprite → Color Mode → Indexed (Ordered Dither).
Keep going
Found something wrong or out of date? Tell us: hello@libresprite.dev. We fix mistakes within a day.