Docs · Tutorial
Getting started with LibreSprite
This tutorial takes you from an empty window to an animated sprite and an exported GIF, using LibreSprite 1.3. Every screenshot is from our own run of 1.3. You need about 15 minutes and LibreSprite installed (download).
Short answer
The whole workflow in one line
File → New (Ctrl+N), draw with the Pencil (B), add frames with Alt+N, turn on onion skin with F3, play with Enter, save as .ase (Ctrl+S), then File → Export (Ctrl+Alt+Shift+S) as a GIF.
Want to follow along with a finished file? Download sprout.ase, our 32 × 32 demo sprite: two layers, four frames, a “walk” tag.
Create a new sprite
On the Home tab click New File…, or press Ctrl+N (Cmd+N on a Mac). The defaults are a good start for game sprites: 32 × 32 px, colour mode RGBA, background Transparent. Click OK.
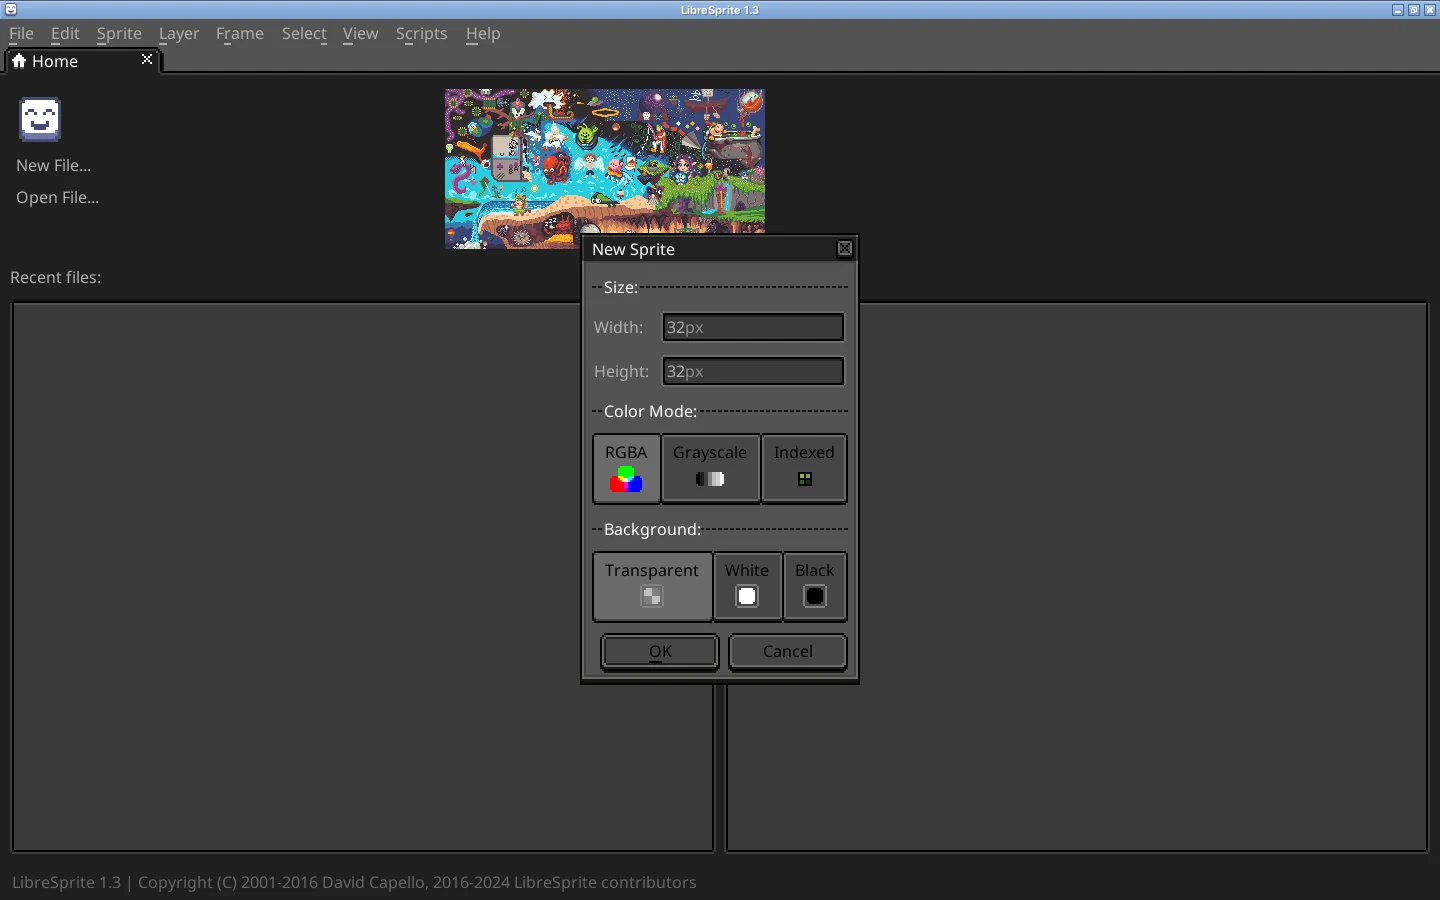
Real screenshot · Linux (Ubuntu 24.04, X11) · LibreSprite 1.3 (AppImage)File → New (Ctrl+N): 32 × 32 px, RGBA, transparent background by default. Size advice: 16 × 16 or 32 × 32 for characters and items, larger for portraits and scenes. Choosing a canvas size.
Find your way around
The colour bar is on the left (palette at the top, colour picker below, foreground and background colour at the bottom). Tools are on the right. The bar at the top shows the options of the current tool. The canvas fills the middle; the small floating window is the Preview.

Real screenshot · Linux (Ubuntu 24.04, X11) · LibreSprite 1.3 (AppImage)A new 32 × 32 sprite: the colour bar on the left, tools on the right, Preview window open, timeline hidden. Two things trip up beginners: the timeline is hidden until you press Tab, and a new sprite opens at 100 %, which is tiny. Press 4 for 800 % (keys 1–6 go from 100 % to 3200 %). Close the Preview with F7 if it is in the way. The interface in detail.
Choose a palette
A limited palette is half of good pixel art. Click the options button above the colour bar (the fourth small button) and choose Load Default Palette for a balanced 32-colour palette, or Load Palette to pick one of the 38 palettes LibreSprite ships with (PICO-8, Game Boy, NES, DawnBringer 16…).
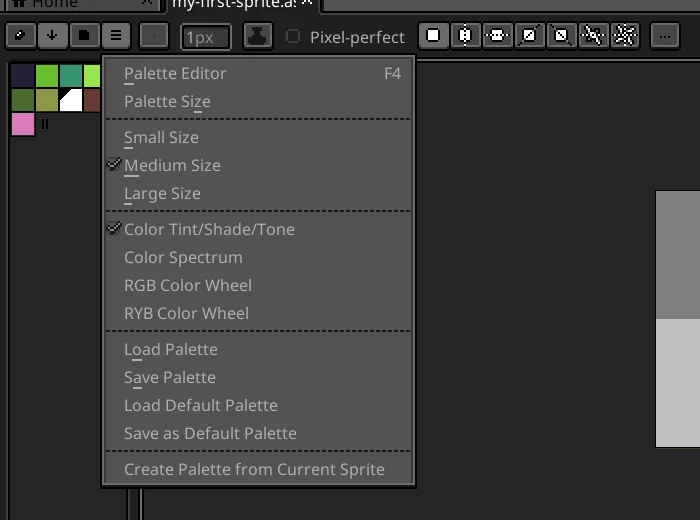
Real screenshot · Linux (Ubuntu 24.04, X11) · LibreSprite 1.3 (AppImage)The palette options button above the colour bar: Palette Editor, sizes, colour wheels, Load / Save Palette, Load Default Palette, Create Palette from Current Sprite. Click a swatch to make it the foreground colour; right-click one for the background colour. Palettes and colour · preview every built-in palette.
Draw with the Pencil
Press B for the Pencil and tick Pixel-perfect in the tool options: it removes the extra corner pixels that make freehand lines look jagged. Left-click draws with the foreground colour; right-click with the background colour. Change brush size with + and -, keep it at 1 px for crisp pixel art.
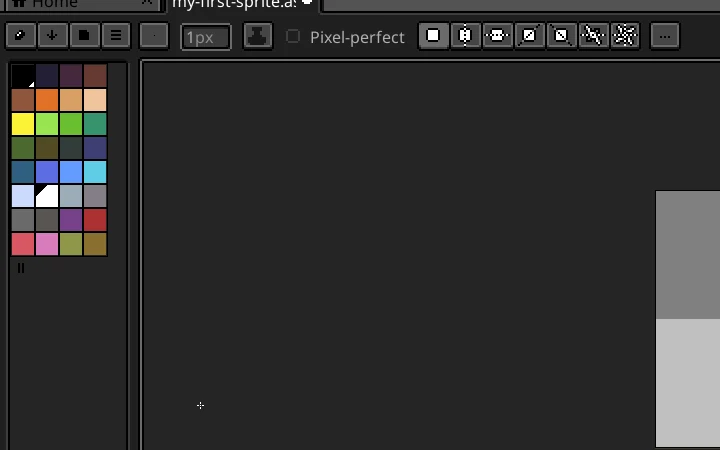
Real screenshot · Linux (Ubuntu 24.04, X11) · LibreSprite 1.3 (AppImage)After Load Default Palette: the 32-colour default palette in the colour bar, with Pixel-perfect ticked in the tool options. Other tools you will want right away: Eraser E, Paint Bucket G, Line L, Rectangle U, and the Eyedropper, which you get by holding Alt. Undo is Ctrl+Z. Show a grid with Shift+G. All tools.
Put parts on separate layers
Layer → New Layer (Ctrl+Shift+N) adds a layer above the current one. Draw details such as a hat or a weapon on their own layer so you can move, recolour or hide them without touching the body. Click a layer name in the timeline to draw on it; double-click to rename it. Layers.
Add frames and turn on onion skin
Show the timeline (Tab) and press Alt+N: Frame → New Frame copies the current frame, so you only change what moves. Press F3 for onion skin: the previous frame shows faintly under the current one, so you can see how far things move.
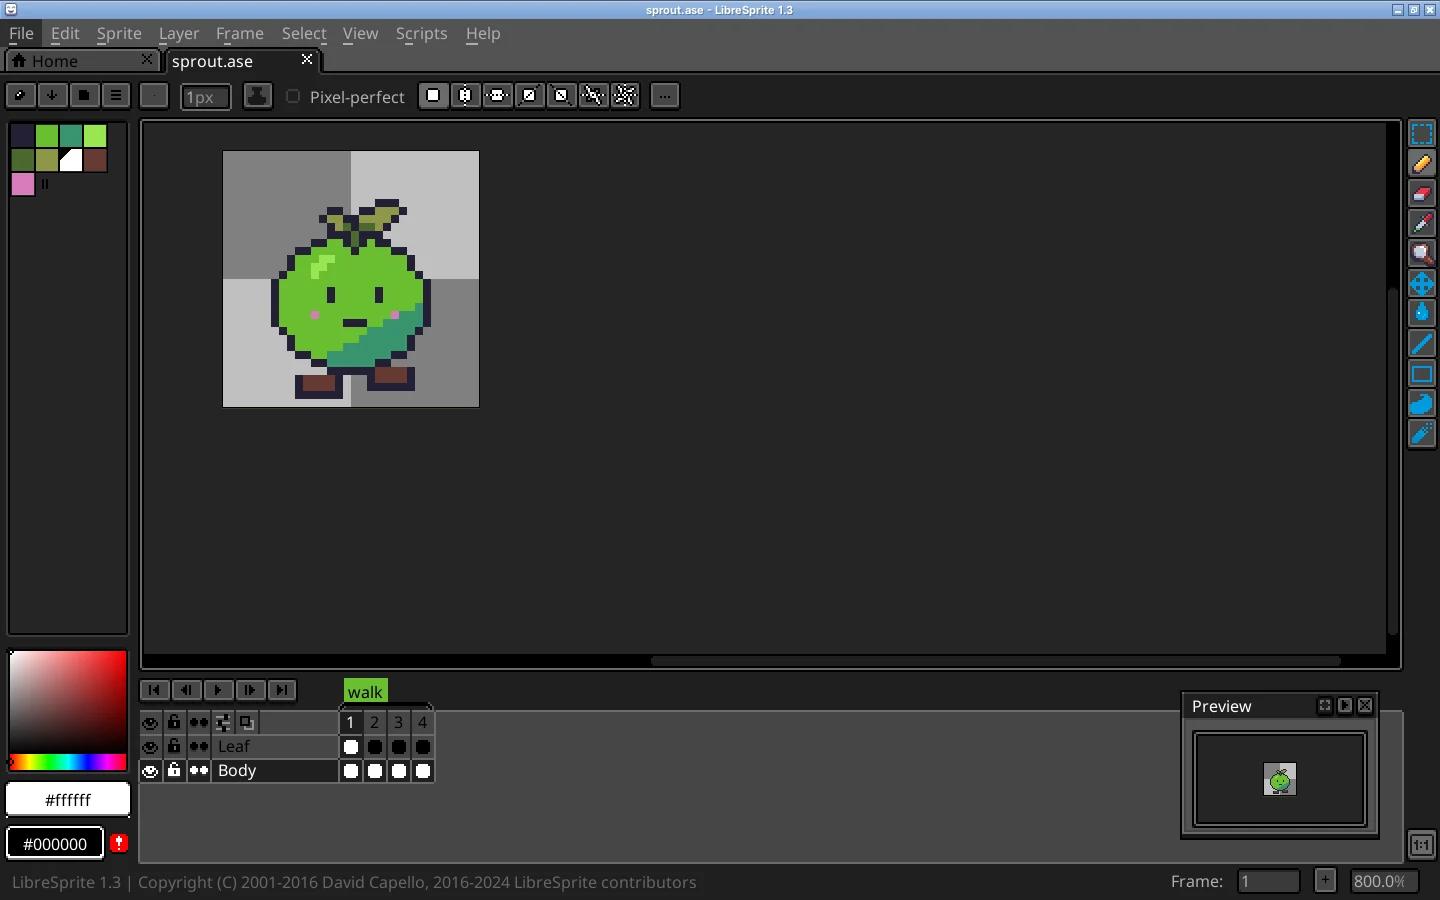
Real screenshot · Linux (Ubuntu 24.04, X11) · LibreSprite 1.3 (AppImage)Sprout open in LibreSprite 1.3 at 800 % with the timeline shown (Tab): layers Leaf and Body, frames 1–4 and the tag “walk”. Move between frames with ← and →. Four frames are enough for a simple walk or idle loop.
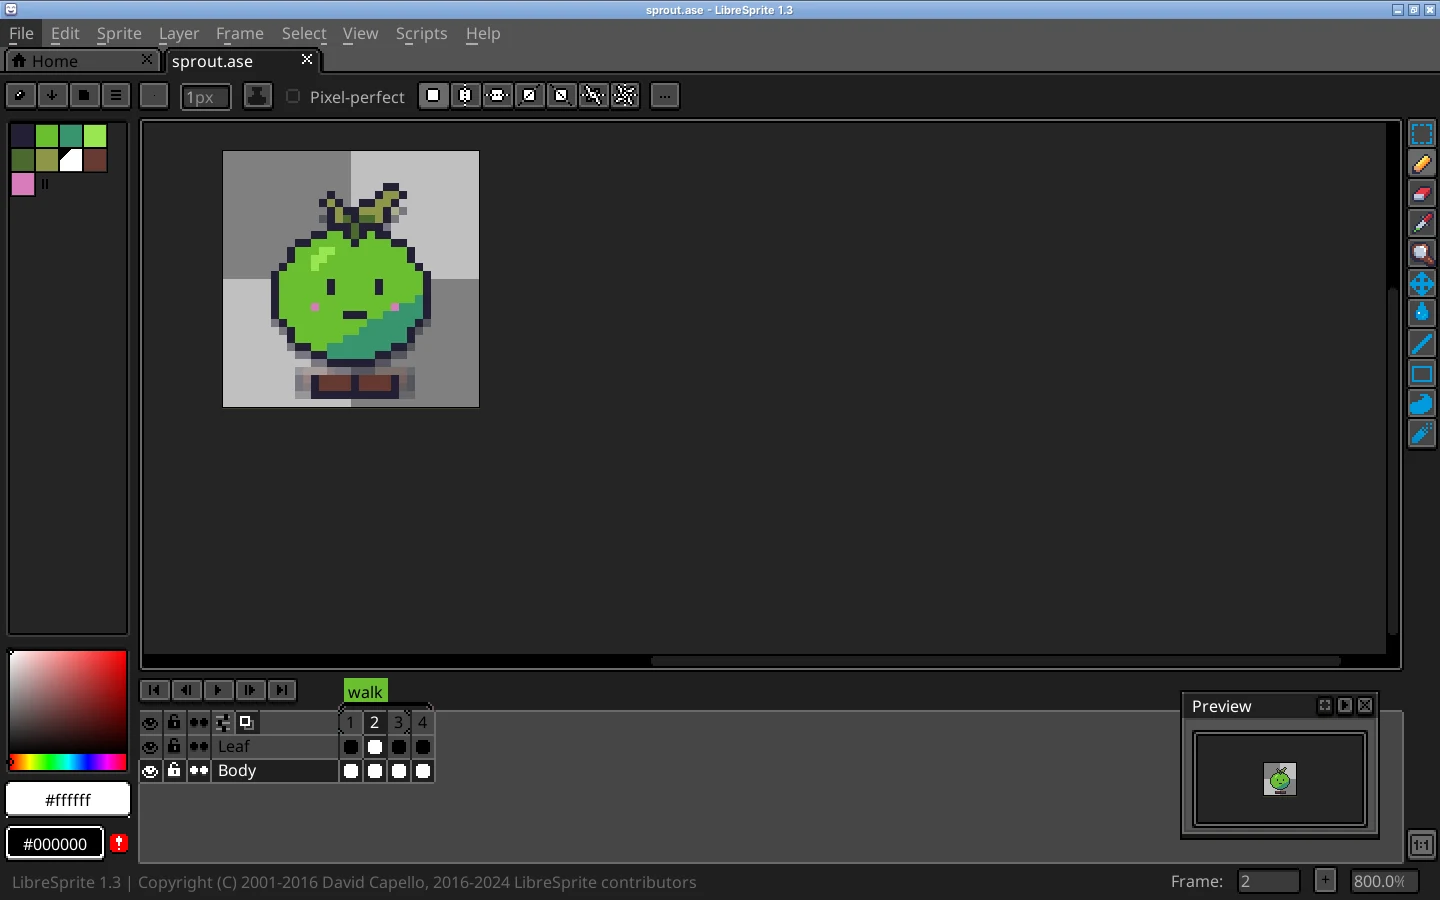
Real screenshot · Linux (Ubuntu 24.04, X11) · LibreSprite 1.3 (AppImage)Onion skin on (F3) at frame 2: the previous frame shows faintly under the current one. Play it and set the speed
Press Enter to play and Enter again to stop. Each frame has its own duration: press P (Frame → Frame Properties) and type a value in milliseconds. 100 ms is 10 frames per second; Sprout uses 120 ms. Select several frames in the timeline first to set them all at once.
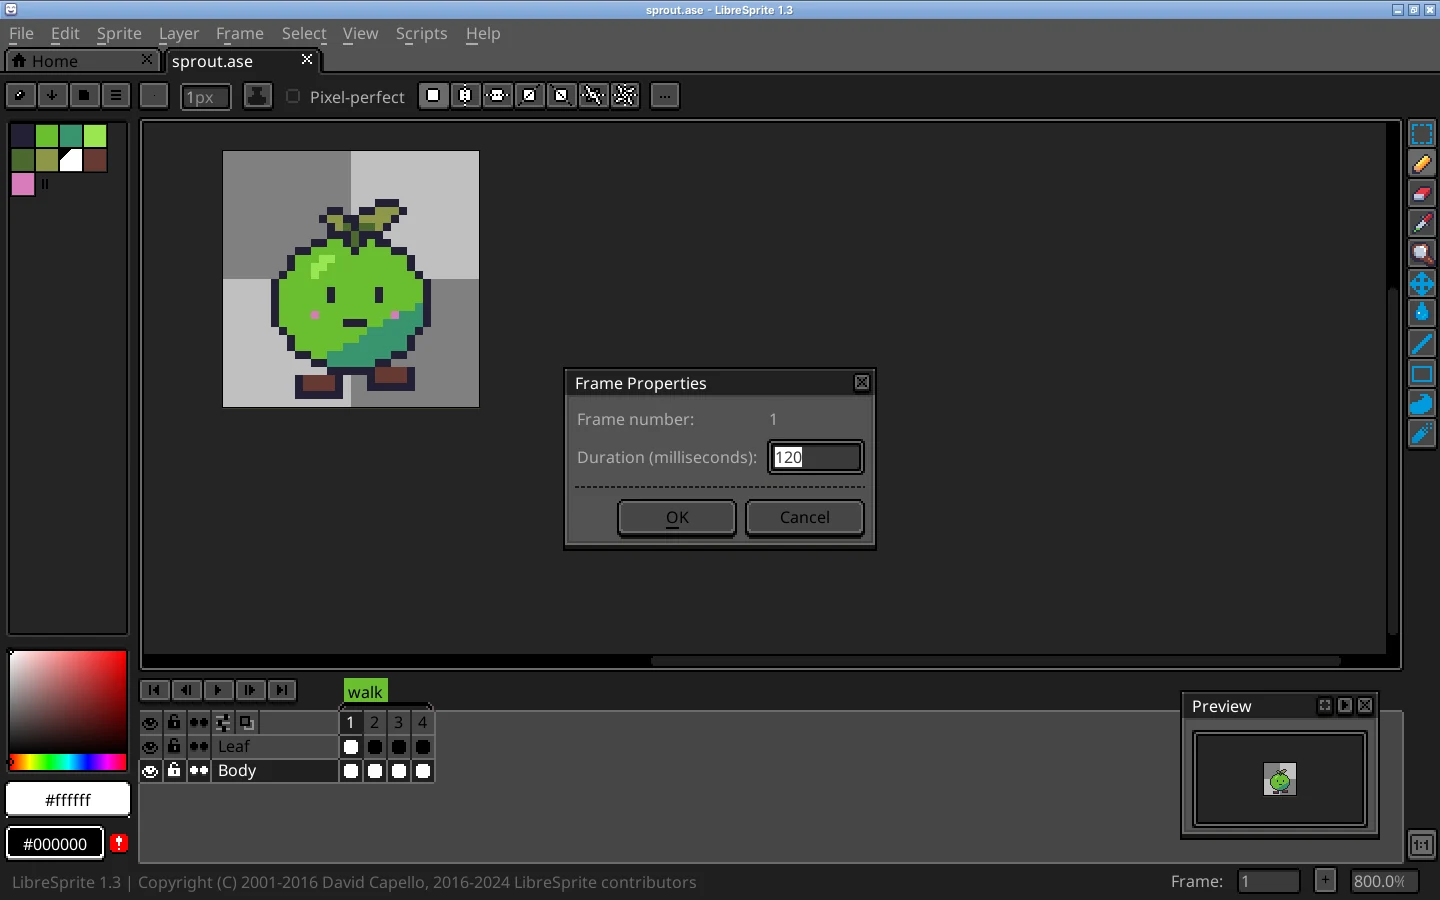
Real screenshot · Linux (Ubuntu 24.04, X11) · LibreSprite 1.3 (AppImage)Frame → Frame Properties (P): the duration of the frame in milliseconds. Save your work as .ase
File → Save (Ctrl+S). Save as
.ase(or.aseprite): it is the only format that keeps layers, frames, durations, tags and the palette. PNG and GIF are for exporting copies. LibreSprite also saves crash-recovery data every 2 minutes by default.Export a GIF or a sprite sheet
For sharing: File → Export (Ctrl+Alt+Shift+S), type a name ending in
.gif, and set Resize to 400 % or more so the pixels are visible. For games: File → Export Sprite Sheet (Ctrl+Alt+E) writes all frames into one PNG, plus a JSON file with frame positions and durations if you ask for it.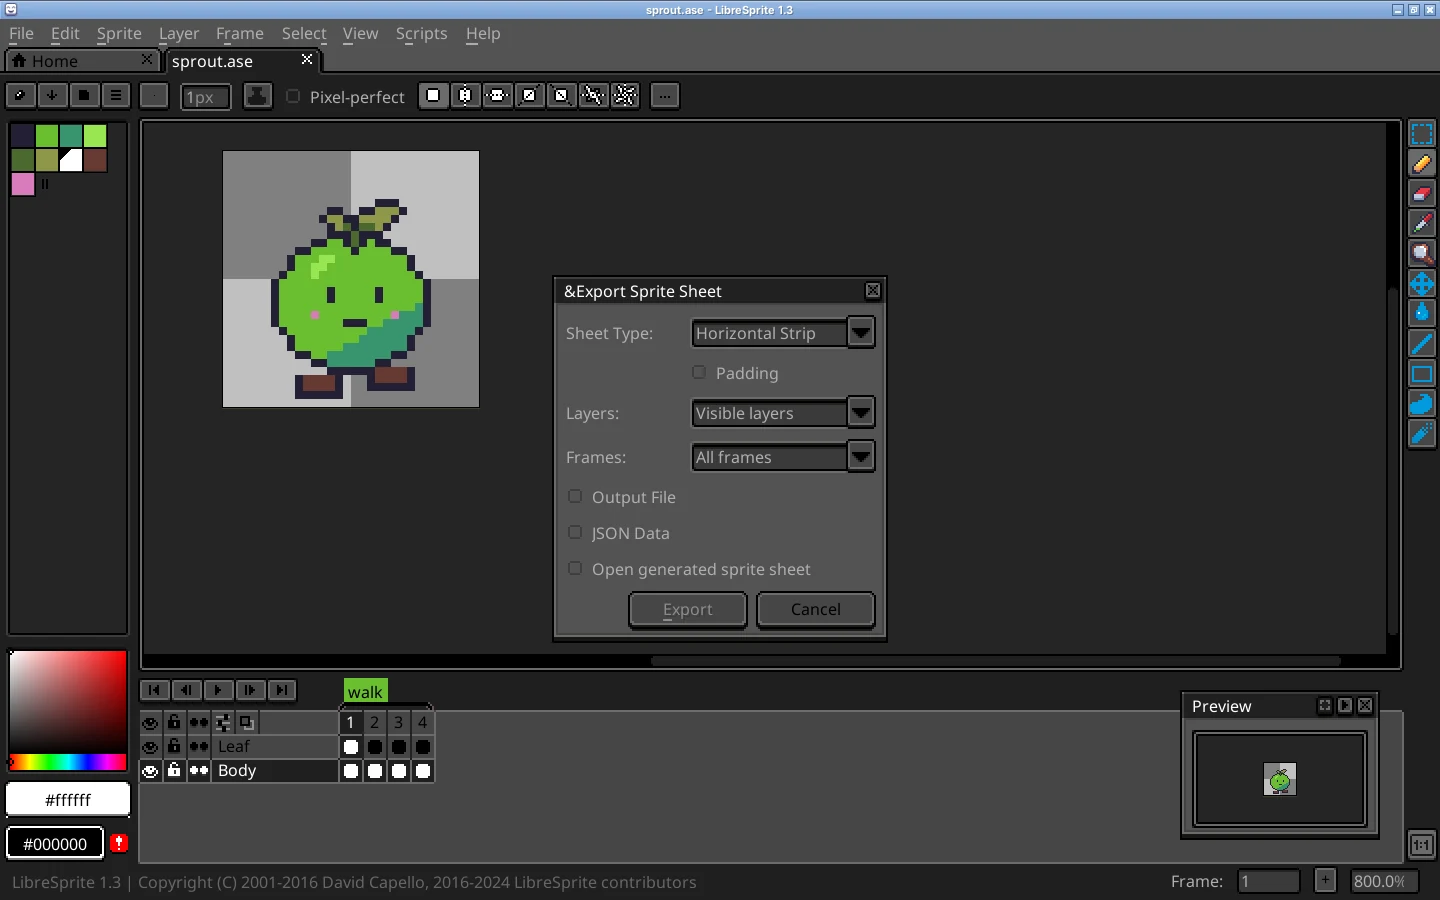
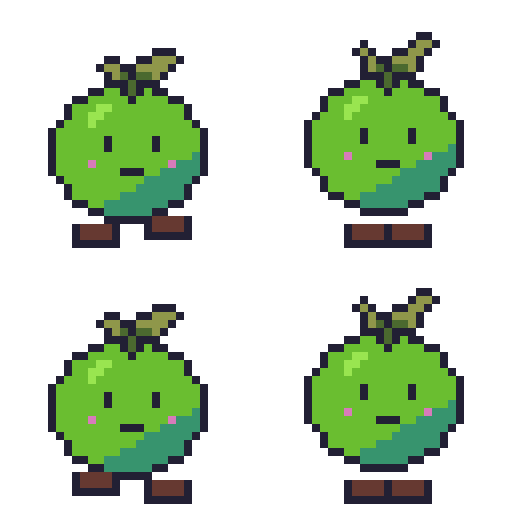
Real screenshot · Linux (Ubuntu 24.04, X11) · LibreSprite 1.3 (AppImage)File → Export Sprite Sheet (Ctrl+Alt+E): sheet type, layers, frames, output file and JSON data. This is what LibreSprite exported from Sprout at 8×:
Where to go next
FAQ
Is LibreSprite good for beginners?
Yes. It has few menus, sensible defaults and the same layout as Aseprite, so most Aseprite tutorials also apply. The GameDev.tv “Pixel Art Fundamentals” course, for example, is taught with LibreSprite.
Can I follow Aseprite tutorials in LibreSprite?
For drawing, layers, frames and exporting, almost always: the menus and keys are largely the same. Features Aseprite added after 2016 (layer groups, tilemaps, slices, the gradient tool, Lua scripts) are not in LibreSprite.
How do I make pixel art in LibreSprite?
Use a small canvas (16–64 px), a limited palette, the Pencil with Pixel-perfect on, and zoom in to 800 % or more. Draw the outline first, then fill and shade.
Keep going
Found something wrong or out of date? Tell us: hello@libresprite.dev. We fix mistakes within a day.